


The next bunting was made for Quirky Queens, my sister in laws party business. She has a customer that wants a “Princess” party as a theme, so that’s where the “princess” bunting was born. After a brief conversation I had an idea of what she wanted. I had to think on how I was going to make the flags. I will give you a rundown on how I made them.
Princess Bunting
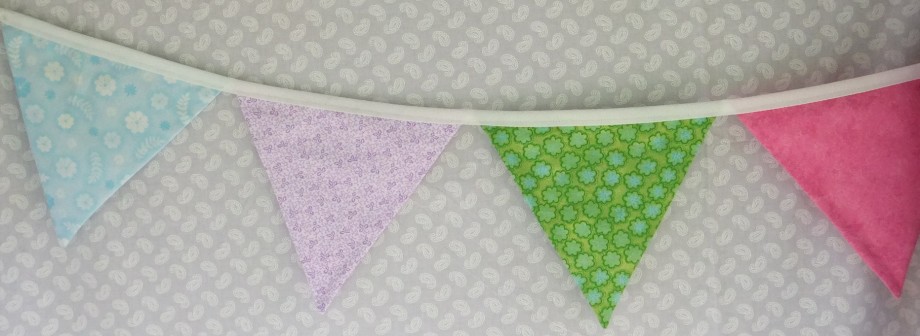
Finished size 78” x 9½” (2m x 24cm), excluding the extra 20” (50cm) either side, to tie the bunting up @ the ends
Fabric requirements
Fat quarter each of four pastel coloured fabrics, dark pink, light pink, purple and blue, this for the front and the back of each flag
Fat quarter of fabric for the lettering
Piece of yellow fabric for the crowns
Roll of Therm O Web, Heat n Bond (⅝” width)
4 yards (3m) of 1” (2.5cm) wide white Twill Tape
Equipment
Sewing machine – oiled and in good working order, Walking foot (optional), open toe embroidery foot (check my tip on machine appliqué), Appliqué paper, neutral cotton thread for sewing and grey for the appliqué, Iron and ironing board, big fabric and paper scissor, rotary cutter, inch ruler with 60˚ angle markings and cutting board, pencil and general sewing supplies.


Press your four fat quarter fabrics in half, so that you have a folded line at the top, cut into 9½” strip on the raw edge side, keeping your folded edge, now cut 3 flags each of the dark and light pink and 2 flags each of purple and blue at 7½” intervals to form a rectangles to make a total of 10 flags sized 9½” length x 7½” width.
Open up the flag and on the wrong side on the bottom of the right hand raw edge side, using the 60˚ angle on the ruler draw 2 lines, this will form the cut out at the bottom of the flag. Now iron on the Heat n Bond on the 2 long sides and above the 60˚ pencil line of each flag, this will hold the 2 sides together. Allow to cool.
Remove the paper strip, now place left hand side on top of the right hands side, wrong sides facing. Press.
Using your 60˚ angle on your rule with your rotary cutter cut on the 60˚ on the bottom raw edge side to form the flag. Trim the long side if you need to.
Here is the Crown pattern template in PDF format. When printing the pattern set the printer on actual size.
For the wording I used Microsoft Word, font Cooper Black and enlarged each letter to 600 its original size. Remember to trace each letter from the reverse (wrong side) if you trace them from the front (right side) your letters are going to be the wrong way! Hope this makes sense.


Trace each letter from the reverse side, onto the smooth side of the appliqué paper, leaving at least ¼” between them then cut them out roughly – there is no need to be accurate at this stage.
I used a grey fabric for each appliqué letter and ironed the letters to the wrong side of the fabric. When they are cool, cut out the shapes accurately on the pencil line.
Remove the backing paper from the appliqué letter and position each letter in the middle of the right side and of each of the 10 of the 9½” length x 7½” width, flags using a ruler, it’s about 1¼” from the top the left and right side will differ for each letter. Iron them in place when you are happy with the arrangement. Don’t forget the two crowns!
Outline appliqué in satin or buttonhole-stitch.
Tips when machine appliquéing
• I move my needle to the most right position, and then I use the edge of my open toe embroidery foot as a guide.
• I also bring my bottom thread to the top to prevent a mess at the back.
After all the stitching has been done press each flag, now they are ready to be made into the bunting.
Fold the tape in half and start sewing the two halves together, sew about 20” (50cm) of the tape together before you place your first flag inside the two halves of tape, and then just sew in each flag into the tape leaving about ¼” between each flag, starting with a crown then the letters making up “PRINCESS”, and ending with a crown. When you have sewn in your last flag sew about 20” (50cm) of your tape, this creates a tail on either side of your bunting to enable you to tie it up.
Happy crafting!
Love
NikkiM

I love bunting it always adds a festive element to a celebration, how lovely to personalise it with your nephew’s name.
It does! Thank you.
Love
NiikiM
Hi I love your bunting! I have been making cake bunting and will post a photo soon! Thanks for the like on my blog, keep in touch. Good luck, Lydia 🙂
Thanks Lydia, will have a look.
Love
NikkiM
I nominated you for the Versatile Blogger award because you sew such pretty things and give enough instructions that even I could do it.
Thanks Anna that’s a very kind thing to do!
Love
Nikki
Hi, love the bunting. I have become a little bunting obsessed lately, can be used for every occasion. Your tips on the letters are very helpful, not done much with applique yet, so will give this a go.
Thanks
Thanks for visiting my blog. I also love bunting and make them for every function, it quick and easy!
Love
Nikki